Product Review Rice Cooker – Peanut Sauce Recipe

**Full disclosure, I stole this picture from the internet. I was not, however, paid to write this, nor was I given any incentive from Cuisinart, I just like my rice cooker.**

Contrary to what my most recent blog posts suggest, I generally cook easy, healthy, whole foods for us during the week.  I’ve been trying really hard to include more green vegetables than starch/carbohydrates, but it’s really hard when your husband’s favorite “vegetables” are peas and corn (aka not vegetables!). Another thing I try to do, since we both work full-time and have a lengthy commute, is to make meals that can feed us for multiple nights in a row, or be re purposed to make something new. Our Cuisinart Rice Cooker/Steamer has been instrumental in helping me do that. It was a wedding gift from our very good friends who have (or had, at the time) the same one! When you’re making dinner, it is very easy to start the rice cooking, and then continue making the rest of your meal. You don’t have to babysit it, and it automatically switches from “cook” to “warm” when the rice done cooking. This rice cooker also comes with a steaming basket that can be used to steam your veggies while cooking the rice, in one convenient appliance! I think that it makes perfect white rice, not over cooked, but still soft all the way through.  Unfortunately, I have not perfected making brown rice in my rice cooker, though I’ve been told that it can be done. I’ve tried increasing the amount of liquid, but it still came out a little too “al dente” for my taste. Since I haven’t had much success, and I’m not sure of the method, I recommend this rice cooker only for those who cook white rice, instead of brown.

Most nights, when I make rice, I make rice for “two” (even though it makes four servings) as follows:

  • Sauté a quarter of an onion (diced) in one tablespoon of olive oil.
  • Once the onion is softened, add one cup of raw rice (my favorite is basmati) to the pan and toast a for a bit.
  • Pour the raw rice and onion mixture into rice cooker, and add one 14.5 oz can of chicken broth.
  • Turn the rice cooker to “cook.” And, presto!

When I make rice, I try to limit myself 1/3 cup serving, along with a few ounces of cooked chicken breast (most nights, we stop at our neighborhood grocery store and get a baked chicken breast, so easy!), and fill the rest of my plate with roasted or steamed vegetables (broccoli, cauliflower, Brussels sprouts, carrots, you name it!). A couple of years ago, I came across this recipe for an easy and delicious (if not totally “authentic”) peanut sauce. Sadly, I can’t remember what magazine it was in (Eating Well? Balance? I’m not sure.) It’s savory, it’s sweet, it’s spicy, and it jazzes up an otherwise bland meal of chicken, rice, and veggies.

Peanut Sauce

Makes 6 “Servings” (Again, I use “servings” loosely, because one recipe will usually feed P and me for two or three nights, but he uses a lot more than I do…)

Ingredients

  • 1/2 cup chicken or vegetable broth (I usually pull 1/2 cup out of the can that I’m using for my rice, and replace it with 1/2 cup of water in my rice. You could use low sodium if you’re trying to watch that.)
  • 1 clove garlic, minced (or, 1 tsp of pre-minced jarred garlic, another weeknight staple)
  • 1/2 cup old-fashioned peanut butter (like Addams, though I have been know to use Jif…)
  • 1/4 cup sugar
  • 1/2 t red chile flakes (more or less, depending on how spicy you like your peanut sauce. I usually eyeball it.)
  • 3 Tbsp soy sauce (Could also use low sodium.)

Method:

  1. Place all the ingredients in a small sauce pan, and stir to combine.
  2. Heat over medium heat, stirring occasionally, until thickened.
  3. Eat!

What is your favorite, easy to prepare, weeknight meal?

New Chairs – Macaroni and Cheese with Lobster

Last summer, P and I took a trip to Costco with Sister and M just to see if there was anything we might need… you know, like like gigantic muffins or a two liter bottle of wine, but what we found was a beautiful brown leather chair. It was perfect in every way! It matched our brown leather sectional couch (exactly!), it swiveled, it rocked, it reclined… Did I mention it was perfect? We took turns sitting in the chair, discussing whether we could afford a pair of them, while Sister and M continued with their shopping. When it came time to check out, we still hadn’t decided, so vowed to continue the discussion. After a week, we still both really wanted it, and decided that we could make it happen.  We drove to Costco to buy a couple, only to learn that it was no longer in stock!!! Apparently, we had found it at the end of “furniture season,” and where just a week before sat our perfect chair, now was filled with artificial Christmas trees and ribbon (no, I’m not kidding, there was an entire aisle of just ribbon!). We deeply regretted our earlier hesitancy, how could we ever find a chair that perfect again?!?…

Last week, I went to Costco on a whim with one of my coworkers. While I was there, out of habit, I walked toward the “seasonal” aisle to see whether they had any living room furniture displayed, and they DID! Lo and behold, there was the chair! The exact same one we wanted last year, at the exact same price point! I snapped a picture with my phone and sent it to P saying simply “THE CHAIR!”

imageWe went and bought two the next night :)

While we were at the store, I wandered around to see if there was anything else that we simply couldn’t pass up, just in case. Enter, lobster.

imageWhen I saw this 2 pound bag of frozen Langostino Lobster Tails, I knew I had to have it, even though I wasn’t entirely sure what I would make with it (I even walked it back to its shelf twice, but couldn’t put it back).

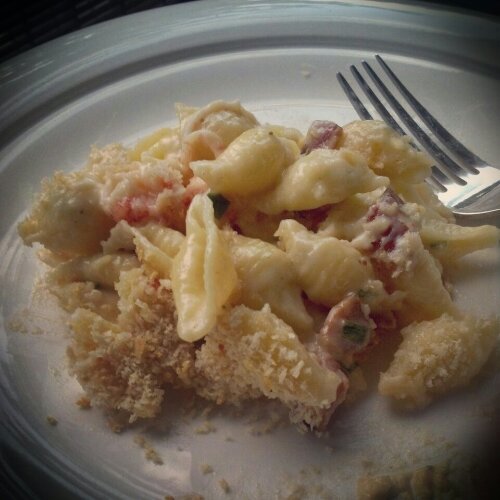
I have a confession, even though I love me some macaroni and cheese, I’m pretty dismal at making it from scratch. I feel like my efforts always come out with sauce that is grainy, instead of velvety smooth. Part of that could be that I have a bad habit of using 1% milk to make white sauce (it’s what P likes on his cereal, and therefore what we have in the house) and using whole milk is infinitely preferrable. The other factor is, I think, using an aged cheese vs. young cheese. **Cooks Illustrated had a blurb in its most recent issue about the corrolation between cheese age and how smoothly it melts, it has to do with moisture content and casein protein.** I ended up using this recipe from The Culinary Chronicles as my inspiration, but made a couple of modifications, because I wanted even more decadence (like macaroni and cheese with lobster needs to be more decadent…)

Macaroni and Cheese with Lobster and Bacon
Serves 6-8

Ingredients:

  • ¾ Pound Pasta (I used medium shells)
  • 2½ Cups Whole Milk
  • 2 Tablespoons Butter
  • 4 Tablespoons All Purpose Flour
  • 1 Shallot, small dice
  • 2 Cups Gruyere Cheese, shredded
  • 1 Cup Cheddar Cheese, shredded
  • 1 Cup Fontina Cheese, cubed (Fontina is such a soft cheese, its difficult to shred unless you freeze it first)
  • 1 tsp Old Bay Seasoning
  • 4 Strips of Bacon, chopped
  • 10 Ounces Cooked Lobster Meat
  • ½ Cup Panko Bread Crumbs
  • 2 Tablespoon Fresh Chives, diced

Method:

  1. Preheat oven to 400° F.
  2. Bring a large pot of water to boil. Cook the pasta following the directions on the package until it’s al dente. Drain well and set aside.
  3. While the pasta is cooking, heat another pot over medium high heat, and render the bacon until crisp and remove with a slotted spoon.
  4. Add the finely diced shallot to the bacon grease (a theme with my cooking, apparently) and sauté until it is beginning to soften, then add butter to the pot.
  5. Once the butter has melted, add the flour and whisk to combine.  Let the flour cook until golden brown.
  6. Add milk and whisk to combine (be patient while it thickens).
  7. Once the sauce has thickened up a bit, remove the pot from heat and add in the cheeses.
  8. Stir until the cheeses have melted and then add in the Old Bay Seasoning.
  9. Add in the pasta, lobster, bacon, chives and combine.
  10. Pour the mixture into a greased 9×9 inch baking dish.
  11. Sprinkle the top with Panko and bake for 25-30 minutes until the top is golden brown.

Enjoy!!

image

Weekend Freedom Machine

Tags

,

When we looked at our house for the first time and I saw the gargantuan yard, I said to P, “If you want this house, you have to promise me that I will never, ever, have to mow this yard…” Now, I’m not saying we have acres and acres, but our half acre parcel has a yard that could almost fit a regulation baseball diamond (the infield, not the whole thing!).  When we started looking for homes, I didn’t think that we needed that much space, we had been living in apartments/condos for so long, I had forgotten what we were missing! In the (nearly) two years that we have lived in our house, we have played catch, kicked a soccer ball, lounged in camping chairs, built a fire pit and sat in front of the fire, and played fetch with our “puphew.” Obviously, the apartment/condo amnesia was very strong.

After closing on our house, P immediately began scouring CraigsList to find the exact John Deere tractor that he had always dreamed of owning. A John Deere 318, to be specific (or, as he refers to it, “the Cadillac of garden tractors”), just like the one he grew up with. Buying a used tractor was no small feat, and for well over a year our lawn was mowed thanks in part to the generosity of P’s dad, who let him borrow his OWN John Deere 318. Each weekend, P would drive to his parents’ house, load up the tractor, bring it home, cut our lawn, load the tractor back up, and drive it back to his parents house… Not a very fun way to spend a Saturday, and I’m sure not what P had in mind when we purchased the house we did.

He had a laundry list of questions and criteria for the person he would purchase his tractor from, the most important of which is that he didn’t want to buy from a small-time dealer. He wanted to buy from someone who (most likely) would have treated the tractor the way he would. Protect it from the elements, and service it regularly.  While, in the end, he didn’t find someone who met all of his criteria, a few weeks ago, he finally found the one!

IMG_20130815_141909He has had a blast mowing our lawn, and using it in conjunction with the (borrowed) dump cart to haul yard waste to our fire pit (we’re finally getting rid of the cursed ivy!). I have loved watching him mow the lawn, and haul yard waste… :) Hardeehar, it sounds terrible of me to say that, but there are many reasons: First, because it makes it more pleasant to be outside, enjoying our large property, and Second, because it makes him so happy! I get such a kick out of watching him ride around on the tractor, because he usually has a big grin on his face while he does it. He likes to joke that we bought the house we did, solely so that he would have an excuse to buy a garden tractor :) Honestly though, I’m not entirely convinced that he’s joking…

Book Review – The Dovekeepers

Tags

,

I’ve been reading a lot of really good books lately, and have wanted to talk/write about them, so I’ve decided to do an occasional book review on Home for Two. My taste in reading is very diverse, from YA Fiction, Fantasy, Dystopian, Mystery, Historical Fiction, you name it, I like it… However, I don’t mean to say that I like every book I’ve ever read, because that is definitely not the case.

My mom had suggested that I read The Dovekeepers, and I was hesitant at first, but I am so glad I took her recommendation!

The Dovekeepers

The Dovekeepers, by Alice Hoffman, is told as a multiple first person narrative, from the points of view of four different women, centering around the Siege of Masada. The book begins from the point of view of Yael, the Assassin’s Daughter (love her name), a young Jewish woman with fiery hair, who has struggled, from birth, with her father’s rejection. I struggled a bit too, when I began reading this book, because even though it was the beginning of a very richly woven story, I couldn’t get past the Hebrew words, and old traditions.  Yael’s narrative sees her lose her brother (Amram), also an assassin and member of the Sicarii, to exile. Soon after she is forced to flee Jerusalem as well, with her hateful father, and his fellow assassin. Yael’s transformation during her desert wanderings is riveting, and my heart ached for her pain. After the death of their companions, Yael and her father are found by other members of the Sicarii who were searching for them at Amram’s orders, and brought to Masada, where Yael joins a group of women who tend to the doves. At what felt like the climax of Yael’s story, Hoffman turns away from her and the tale continues from the point of view of Revka, the Baker’s wife.

Revka’s story takes the reader back in time, to her own exodus from Jerusalem, the death of her husband, and the tragic events which caused her two young grandchildren to lose the power of speech. Her story comes back to the “present” (where we left off with Yael) and explores her relationship with the other Dovekeepers, as well as her relationship with her son-in-law.  Revka, to me, was a very traditional mother figure, who cares deeply for those in her custody, including Yael and her son. As with Yael’s story, I felt that just as I was learning who Revka really is, and how far she would go to protect those she loves, Hoffman changes narrators once more, to Aziza, the Warrior’s Beloved.

Aziza’s point of view was, above and beyond, my favorite. I identified with her for many reasons, one of which is that I am an older sister to a younger sister, and we have been fortunate to be best friends all of our lives. Also, I have always been a bit of a tomboy, as Aziza is. As with Revka, Aziza’s story takes the reader back in time, and shares a back story to color our perception of the character. Aziza has a secret, and even though I would love to write more detail about her story, I don’t want to spoil the surprise (at least, the surprise that I felt) over her secret. Needless to say, she is a strong woman, who is stuck in a world where women are second class citizens. Hoffman then brings us to a close with the point of view of Aziza’s mother, Shirah, the Witch of Moab.

At this point in the book, we have seen a lot of Shirah from the other people’s points of view, but know little about her past, and what motivates her. Shirah’s story is one of ancient magic and mysticism. Her story broke my heart in so many ways, but was also enlivening, because she found a way to survive, to do what needed to be done, and to help the women around her.

I have read other reviews that describe Hoffman’s story as “a lot of hot air” (from Goodreads) but I enjoyed the beautifully crafted language, and the strong women characters. I don’t think that this story is for everyone, but I thought it was delightful. Each woman represented a different kind of strength, and I loved each of them for different reasons.

Have you read it? What did you think??

Cabin Part II – Corn Chowder

Tags

,

After rebooting Home for Two on Saturday, P and I decided to take a short walk to “The Point.” We sat on our favorite piece of driftwood for a while, and talked about some very deep topics, like what we will do when we win PowerBall, and where our next vacation should be.  After a while of enjoying the sun and sea breeze, we decided to keep walking along the water, instead of turning for home. As we continued around the east side of the island, we had a little adventure trying to get out on to the main road without trespassing on anyone’s property (turns out, not really possible as much as we tried really hard to avoid it. We each have the giant bug bites to prove it!). Once we got back to The Cabin, and had a quick change of clothes (two words: GRASS SEEDS), it was time to get the crab pots that we dropped the night before. It felt so great being out on the boat after our long, hot walk!

imageLiving in the Pacific Northwest, I have had my fair share of Dungeness Crab, but there is nothing better than eating it on the beach, less than an hour after it was alive. Seriously. We are not as gung-ho about crabbing as others along the beach, however we do like to eat at least one or two while we’re at The Cabin.  I usually toss a couple of ears of corn on the grill, and maybe boil some potatoes as “sides,” but this weekend I wanted to try something different. While cruising Tastespotting earlier in the week, I came across a recipe for corn chowder that piqued my interest and I had five ears of corn in the fridge just begging to be used! In an effort to lighten it up a little (which was promptly thwarted by my use of bacon grease to cook the corn), I used what has become my standard method for making a nice thick soup (which I learned while reading The Cooking Photographer).  This method has been life changing, I use it all winter long to make many different types soups. Sometimes I wonder whether P gets tired of eating variations of the same soup, but as they say, if it ain’t broke, don’t fix it!  I think when I make this soup in the future, I will add more bacon, and finish it with some green onions, but I did not include that addition in my recipe below.

Corn fresh off the cob cooked in bacon grease

Adapted from “Summer Corn Chowder Recipe

Serves 8-10

Ingredients:

  • 1 cup shredded cheese (I usually use the Kroger 2% Mexican Blend)
  • 3 slices thick-cut bacon (diced)
  • 3 cups corn kernels (divided) (I cut the corn off of 5 cobs, it was a little more than 3 cups)
  • 2 Tablespoons of Butter
  • 1 onion (diced) I used about 3/4 of a white onion that I had leftover
  • 3 medium yukon gold potatoes (chopped) (the original recipe called for russets, but I prefer the buttery texture of yukon gold potatoes in my soups)
  • 2 tablespoons, plus 1 teaspoon all-purpose flour
  • 4 cups chicken broth
  • 2 tablespoons dry white wine (optional, but I had it on hand)
  • 2 cups milk (we buy 1%, so that’s what I used)
  • Finely chopped chives
Method:

  1. Toss 1 teaspoon of flour with the cheddar in a small bowl. Set aside.
  2. In a large pot render the bacon until crisp, remove with a slotted spoon
  3. Add the corn to the pot, and sauté with the bacon fat(!) for about 5 minutes (not enough to cook the corn all the way, just enough to imbue the corn with smokey bacon-y goodness)
  4. Remove from pot and set aside.
  5. In that same pot, melt the butter over medium-high heat. Add the onion and cook until tender. About 5 minutes
  6. Sprinkle 2 tablespoons flour over the onion and cook for 2 minutes or until the roux is golden
  7. Add the chicken broth, wine and potatoes. Cover and gently boil until potatoes are almost fork tender. Stir frequently, so they don’t stick to the bottom of the pot.
  8. While the potatoes are cooking, take one cup of cooled corn, and blend it with the milk (this really kicks up the corn flavor in the soup!)
  9. Add the remainder of the corn, milk, cheese mixture, and chives and bring to a simmer for about 5 minutes, or until the cheese is melted and chowder thickens to taste (Be careful not to let the soup boil again, otherwise the cheese will “break” and while it still tastes good, it looks disgusting!)
Enjoy!

image

Blog Reboot – Breakfast Casserole

Tags

,

Today, I’ve decided to reboot Home for Two. It has been languishing for far too long. I think being a regular blogger takes a huge amount of discipline, discipline that I don’t really have, but I do my best.

P and I are spending a lazy weekend at our family cabin. When we were in college, we spent almost every weekend and many week nights out here, since it’s only a half hour drive south of Bellingham. Back in those days, our usual fare consisted of Costco burgers on Franz onion buns, Chex Mix, Eggo Waffles, and plenty of Miller High Life. Don’t get me wrong, I still love an occasional Eggo Waffle, but our tastes have grown up slightly since then, and usually I crave something savory for breakfast. Enter Breakfast Casserole.

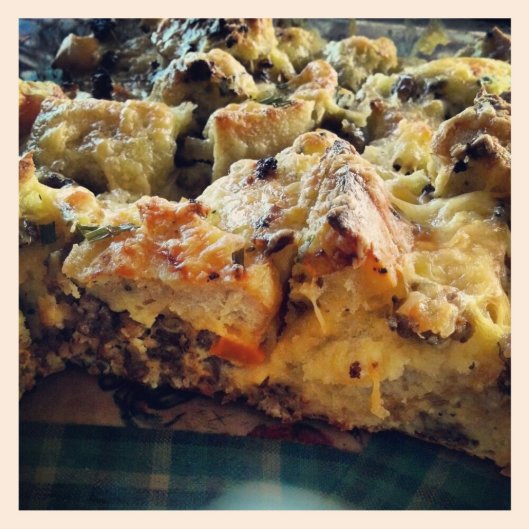
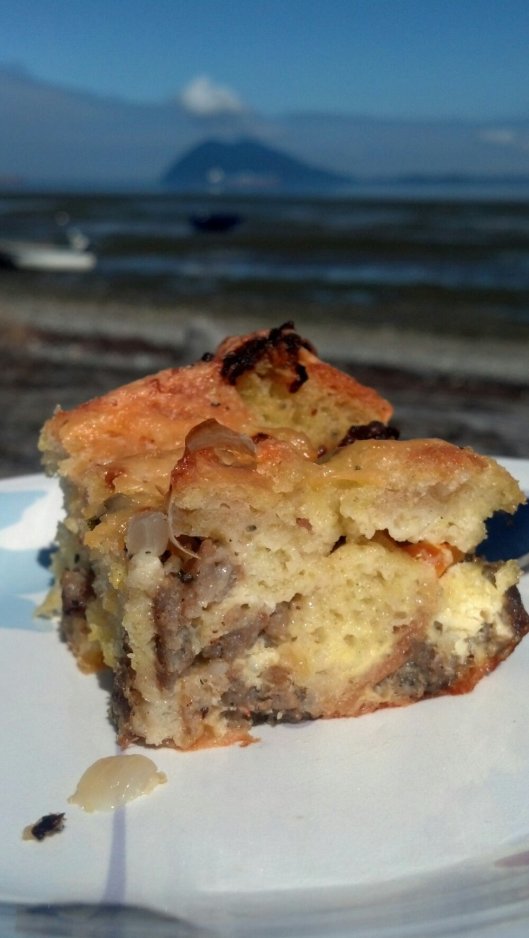
imageGrowing up, my mom made a breakfast casserole with ham and cheese which was (and still is!) one of my favorites.  It is my inspiration for this casserole, though the texture of Mom’s breakfast casserole is more quiche/souffle, and my version is more like a savory baked french toast.

Breakfast Casserole a’la Emily (serves 8*)

Ingredients:

  • 1 “round” of Bread (my favorite is La Brea Bakery’s Rosemary Olive Oil bread) (cut into half-inch pieces)
  • 10 Eggs (beaten)
  • 1/4 cup of milk
  • 1 pound of Sausage (I usually use Jimmy Dean, Sage)
  • 1 Bell Pepper (chopped)
  • 1/4 Onion (diced)
  • 1 cup of shredded cheese (divided)
  • Chives (optional)
  • Salt and Pepper (to taste)

Method:

  1. Preheat oven to 350 degrees.
  2. Combine the eggs, milk, salt, and pepper in a large mixing bowl, stir to combine.
  3. Mix bread pieces into the egg mixture, set aside (this helps the bread absorb the egg mixture).
  4. While the bread is absorbing the egg mixture, brown the sausage in a large pan.
  5. When the sausage is almost cooked through, add the peppers and onion to the pan and sauté while the sausage finishes cooking.
  6. Drain the sausage, pepper, and onion on a paper towel.
  7. Add 1/2 cup of the cheese and the sausage mixture to the now saturated bread, and stir gently to combine.
  8. Pour into a 13×9 greased baking dish.
  9. Top with the remaining cheese and chives.
  10. Bake covered in foil for 30 minutes.
  11. Remove the foil, and continue baking for 15 to 20 minutes.
  12. Remove from oven, and let rest for 5 minutes.

Serve and enjoy!

image*By 8, I mean that I cut it in to 8 pieces… it’s debatable whether 1 piece is enough for a “serving.”

Beautiful Day

Oh what a beautiful mornin’ oh what a beautiful day… Spring has finally sprung here in the Pacific Northwest! I have spent a majority of my day sitting in a zero-g chair from Costco, reading my book, and enjoying the sun. One of our rhoddies is in full bloom, and it reminded me of when P and I first toured this house. It was late July or early August, so the weather was quite comparable to today. The yard was full of juniper and out of control blackberries. We (which is to say P) have done a lot of work clearing out and tidying up. The front of our house used to look like this, taken the day we got our keys.

Now, it looks like this!

image

Not 100% there, but getting closer! It is really quite idyllic.

Happy weekend!

First Foodie: Fusion

I am so excited that I’m finally getting to do a blog post about something that I’ve cooked! As I’ve mentioned before, I have really been looking forward to cooking in our new house. I have so much fun experimenting, even though my tester is usually a reluctant participant. This week, I’ve been trying to get back in to planning meals out for the week, and re-purposing leftovers to make something new. On Monday night, we decided to fire up the grill, and cooked some Italian chicken sausage, which we enjoyed with rice, caramelized onions, and roasted veggies. The sausage came in a package with 5 sausages, and our rice cooker usually makes enough rice for two meals.  I had originally hoped to make some fried rice (which would have used up some leftover carrots and celery) but felt that the Italian flavored sausage would not go well with the Asian flavors of fried rice.

After noodling it for a while, I decided that there was no reason why rice couldn’t be used as a substitution for pasta to make Carbonara Fried Rice. I bought some bacon from the deli, and rendered it while P grilled up the remaining sausage.  While the bacon was rendering, I beat a couple of eggs with a palm-full of Parmesan cheese, and a dash of Penzey’s Pasta Sprinkle. After heating up the rice in the same pan with the cooked bacon, I added the egg mixture, the same way I would fried rice. For some color, I also added a handful of frozen peas, which added some nice pop to the dish.

Carbonara Fried Rice (The measurements are approximate)

Ingredients:

  • 3 links of cooked Italian Chicken Sausage cut in coins
  • 2 Tbsp olive oil
  • 3 strips of bacon, chopped roughly
  • 2 cups of rice (I use cold, leftover rice when making fried rice)
  • 2 eggs, beaten
  • 2 Tbsp of Parmesan cheese
  • 1 Tbsp of Penzey’s Pasta Sprinkle (basil, oregano, garlic, and thyme)
  • 1 cup of frozen peas

Method:

  1. Add olive oil and bacon pieces to pan.  Render bacon until chewy, but not crisp, it will continue to cook as the rest of the ingredients are added.
  2. Add rice to the pan, and toss with the bacon pieces oils in the pan.
  3. While the rice is heating through, beat the egg with Parmesan cheese, and Pasta Sprinkle
  4. Once the rice is heated through, pour the egg mixture over the top and stir vigorously to coat the rice, and cook the egg.
  5. Add frozen peas, and toss until warmed through.
  6. Add coins of chicken sausage, and give one last toss to combine.
  7. Top with additional Parmesan cheese to taste (P doesn’t like Parmesan, at all, so when I make dishes that call for it, I tend to cut it down, and then add it to my own portion).

I think it could have used a little more “sauce” to bind it. Usually, when I make fried rice, once I add the egg, I also add a little soy sauce, or teriyaki sauce as a binder. Possibly a touch of chicken stock might work to add a little bit of “binding” to the dish, while keeping with the flavor profile. If anyone tries this out, let me know what you think!

Carpet and Tile

The hardwood has been installed for a while now, but as of today, all of our flooring has been installed! They have some transitions to finish, but P and I can definitely move in this weekend!

I love our bedroom! I’ll be honest, I had been rethinking the teal wall, but after seeing the room 99% put together I’m glad I didn’t change it.

image

It looks pretty dark in the picture, but I love it!

Here’s the master bathroom! They did a wonderful job tiling around our curved shower.

image

I had been so worried that the tile was going to end up being too brown (we chose one that was brown and grey so that we wouldn’t be locked into a color scheme) but, I think it turned out great!

I’m so happy! If only I wasn’t sick, I could match P’s enthusiasm… Oh well, better to be sick now than Saturday! Yay!

Home Stretch

In less than one week, we will begin moving into our house! It’s been quite a long haul, but after four months, we can see the light at the end of the tunnel! This weekend, P and I did a lot of very tedious finish work. Thank goodness I have a patient husband because I certainly am not. He scooted around, braving splinters in his behind, painting the baseboards before carpet gets installed (Tuesday!). I used Liquid Sander to strip the dark finish off the inside of the front doors. Here is a mid-point photo, showing the difference between stripped and not.

image

Now I’ve only gotten one coat of primer on, but it gives a good idea of what the final product will look like, since the doors are going to be white.

image

This process has been fun, challenging, and has really given P and I lots of opportunity for growth in our relationship. T-minus six days. This time, we mean business.